Bivouac-in-winter: Our tips to get ready

Winter Camping : Our tips to get ready

Check out our tips for camping in the great outdoors in winter, from choosing your equipment to deciding on the location.

Ready to explore the wonders of winter by bivouacking in the snow? For a safe, memorable experience, it’s essential to be well prepared. In this article, discover the equipment you need, the precautions to take and our tips for a great winter adventure.

3 minutes to understand the basics of camping in the snow

bivouac-in-winter-destination

STEP 1: Planning the date and place

Before setting off for a bivouac in the snow, you need to decide on a destination. If you’re looking for snow, you’ll likely choose the mountains or northern countries. If you’re already a summer mountain enthusiast and want to go bivouacking without a guide, choose a hike and place you already know, all at low altitude.
However, it’s important to realise that even if you know the place well in summer, it will be very different in winter, and there may also be avalanche risks you need to consider. For these reasons, if you’re not trained in dealing with avalanches, or not used to bivouacking in winter, we strongly recommend that you call on a guide (or mid-mountain leader) to accompany and train you.

Camping in winter in all weathers?

Bivouacking in winter requires good flexibility to adapt to possible changes in the weather. Indeed, you need to be prepared to change the date for your bivouac if weather conditions aren’t on your side on your chosen date: snowstorm, strong wind or maybe a freezing spell.

  • Look at the temperatures for the altitude of your bivouac, as well as the wind chill
  • Take into account the direction of the wind to find a place that might be sheltered from it
  • Avoid passes and summits if the wind is blowing too strongly.

Bivouac-in-winter: Our tips to get ready

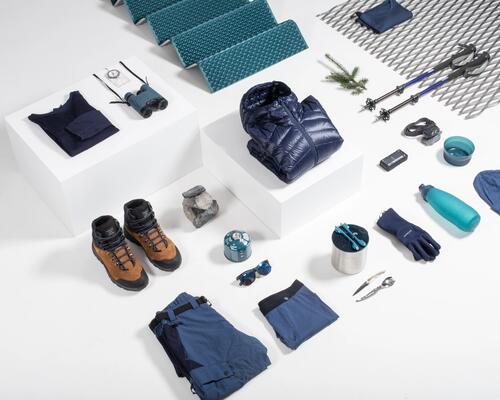
STEP 2: What equipment should you take for a winter bivouac?

The list below is not exhaustive, so remember to adapt it to the conditions of your planned bivouac.

What clothes to wear for a bivouac in the snow? 4 layers

In winter, layers of clothing are your best friend. On the way up to your bivouac site, you may get too hot and so have to remove layers as you go, then put them back on progressively once you get there.

Among the 4 layers of clothing we recommend :

The base layer : breathable

  • Upper body: tight-fitting T-shirt, made of merino wool or synthetic fibres
  • Lower body: merino wool leggings
  • Hands: merino wool undergloves
The insulating, breathable layer
  • Upper body: fleece, softshell or merino wool underjacket
  • Lower body: hiking pants or softshell pants in case of intense cold (acts as layer 2 and 3)
  • Hands: merino wool, synthetic fibre or leather gloves (acts as layer 2 and 3)
The insulating layer
  • Upper body: Warm down jacket made of feathers or wadding, softshell jacket
  • Lower body: hiking pants or softshell pants in case of intense cold (acts as layer 2 and 3)
  • Hands: merino wool, synthetic fibre or leather gloves (acts as layer 2 and 3)
The outer protective layer
  • Upper body: parka, waterproof jacket, windcheater, poncho
  • Lower body: waterproof, windproof hiking overpants
  • Hands: waterproof over-gloves
Would you like more information on the 4-layer technique ?

How to choose your tent for winter camping ?

To go on a winter bivouac, it’s important to have a tent that can withstand winter weather (strong winds, snow, etc.).
If you already have a 3-season hiking tent, it should do the trick if you don’t plan to set up at too high an altitude and no snowstorms are expected.
In case of storms or heavy snowfall, a 4-season tent is recommended. They generally have sturdier poles and heavier fabrics than 3-season tents.
When choosing a tent, it can also be useful to have a little extra space in it to store your equipment inside.

Please note: before you go bivouacking with your tent, try to set it up at home to get the hang of it if it’s not your usual tent. If you’re going to a place with heavy snow covering, take long stakes so you can drive them far enough into the snow. You can also use your hiking poles.

Finally, if you only bivouac occasionally, you can also hire your tent and equipment.

bivouac-in-the-snow

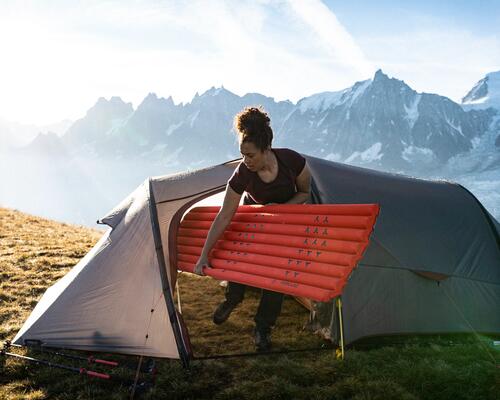
How to choose your mattress for bivouacking in the snow?

Often overlooked, the choice of mattress for a winter bivouac is essential to provide good insulation from the ground. How to optimise insulation from the ground when bivouacking

  • Insulation from the ground starts with a mattress with a good R-value.
  • What is the R-value ? It’s the measure of a mattress’s thermal insulation capacity in relation to the ground.
  • For 4-season use of your mattress: R-value > 3
  • For using your mattress in extreme cold: R-value > 4,5
  • To increase the insulation from the ground provided by your mattress, add a foam mattress below the first one.

Choosing a sleeping bag

Now that you have good insulation from the ground, let's move on to the sleeping bag, so you can keep nice and warm at night.
Here are some tips for choosing your sleeping bag for a cold winter’s night:

  • Depending on the average temperatures expected at the location and altitude of your bivouac, choose a sleeping bag with a comfort temperature of -5 or -15°C. For extreme cold, there are duvets adapted to much lower temperatures, but less accessible in terms of price. Note that the perception of cold also depends on each individual - if you’re usually sensitive to the cold, choose greater comfort temperatures.
  • Natural down (goose or duck) offers good performance in terms of warmth, insulation and compressibility.
  • Synthetic down for its part offers good value for money and better resistance to humidity.
Tips for your bivouac:
  • Once you get to your bivouac site, take your sleeping bag out of its cover, so that it gains its proper volume by the time you go to bed.
  • Add a silk sheet inside your sleeping bag for increased comfort.

bivouac-snow

Food and stove

To keep your body warm, in winter, it tends to burn more calories. So you need to provide good portions of food to help it maintain the right temperature.

Here are some examples of food to take with you:

  • CEREAL BARS
  • Dried fruit
  • Nourishing freeze-dried meals with a high calorific intake
  • Stove that can function even with winter temperatures
It’s advisable to eat between 3500 and 5000 calories to keep your body warm.

STEP 3: what precautions should you take for a winter bivouac?

  • Adapt your equipment to the outside temperature
  • Use a thermal sheet
  • Cover your extremities
  • Have a hot drink before going to bed. You can also use the container to heat the inside of your sleeping bag (provided it’s not damp).
  • Keep your mouth and nose exposed to the air (and not inside your sleeping bag to avoid creating humidity)
  • Have the necessary knowledge about avalanches and the required equipment.

Bivouac-in-winter: Our tips to get ready

Avalanche safety equipment

Before setting off for a bivouac in snowy mountainous terrain, it’s essential that you have the knowledge and equipment necessary to prevent risks from avalanches.

Go on your first winter bivouacs with a guide so you can move around safely and get trained in avalanches and the significant risks the mountains present in winter.

How to avoid avalanche risks?

  • Keep informed about weather conditions and risk areas. To do this, you can consult the avalanche risk assessment bulletins from weather forecasting or danger indicators set up in winter sports resorts.
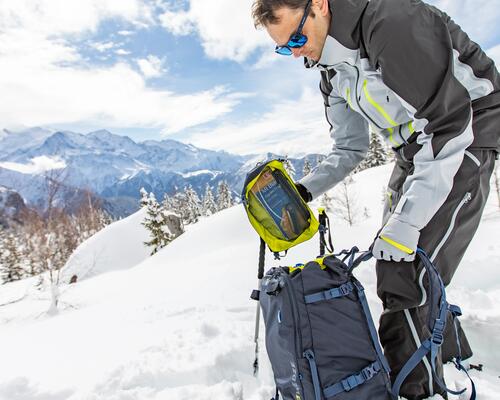
  • Carry an AVD (avalanche victim detector) or ARVA (avalanche victim search device), a shovel, probe and phone, whatever activity you’re doing (off-piste skiing, hiking, etc.).
  • Never head off alone.
  • Inform your loved ones of your planned route and return time.
  • Cross any risk areas one by one, then take shelter in a safe area.
  • When hiking, maintain an adequate distance between each member of the group to avoid overloading snow slabs.
  • Choose less steep slopes, which are less exposed to risk.
  • Always keep an eye on other members of the group. Never stop below the tracks of others, where the risk of avalanches is greater.
  • Make smooth progress, avoiding sudden movements and, if possible, falls.
If you’re crossing a snowy landscape, you must be able to identify and avoid avalanche terrain. Before setting off, you can take avalanche training.

camping-winter

More Bivouacking and Hiking tips

A list of the  essential equipment you’ll need for a mountain hike

A list of the essential equipment you’ll need for a mountain hike

Can you hear the mountains calling to you to set off on your first trek? Here is our checklist of essential items!

how-to-choose-your-hiking-trekking-boots

How to choose your hiking or trekking boots?

Your hiking or trekking boots should be chosen according to 5 criteria. Here is our guide!

How to choose the best camping and hiking mattress

How to choose the best camping and hiking mattress

Find your ideal camping mattress by following our tips for choosing between an inflatable, self-inflating or foam model for your adventures.

WITNESSED AN AVALANCHE? HOW TO PROVIDE ASSISTANCE

WITNESSED AN AVALANCHE? HOW TO PROVIDE ASSISTANCE

Did you know that before going to rescue the victims of an avalanche, you must put your safety first? Find out what to do, with the help of pictures, and check out all the steps of an avalanche rescue without support.